Our last post discussed using fisa-vimrc and appreciating the simple installation and ease of use. This post will explore, briefly, some tweaks and a short “how to” for each of the loaded plugins. This exercise will be worth your time if you have not explored these tools before.
Do not be concerned about finishing this post in one sitting. Take a section at a time and play with it. Move on when you are ready. A lot of information is here but that is because you have lot available to you under the hood. The sections below minimumly scratch the surface. Go play with each plug-in to at least find out what features it offers.
A copy of my current modified fisa-vimrc is here: [modified fisa-vimrc.raw ](/dlfiles/modified-fisa-vimrc.raw)There are a lot of tips in this post. Many are associated with the reference Plug-ins but a good number of them are vim tips. Always keep in mind that these plug-ins provide power but with power comes responsibility. The responsibility here is to understand how these plug-ins are manipulating the real power - the power of vim.
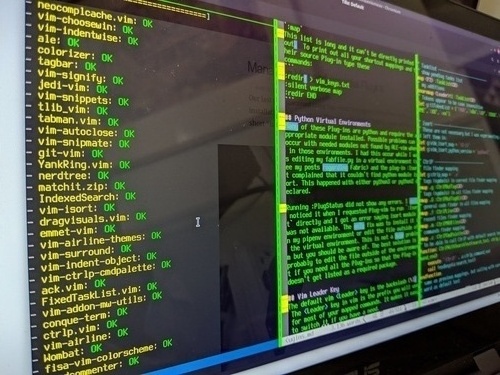
Table of Contents
- Preparation
- Vim-Emmet
- SnipMate & Snippet Templates
- Tagbar
- Window Chooser - chooserwin
- Vim-TabMan
- Numbering and Relative Numbering
- ALE
- Airline
- Vim-Surround
- Vim-Matchit
- Vim_AutoClose
- YankRing
- Vim-NeoComplCache
- NERDTree
- NERDCommenter
- CtrlP
- TaskList
- Vim-Ack
- Dir-Configs-Override
- Git-Vim
- Vim-Colorizer
- Other Personal Changes and Short-Cuts
- Bonus Plugs - enhancing productivity
Preparation
- Save a copy of your current ~/.vimrc
- Get and install fisa-vim-config]
- Read this post, play, enjoy
- Along the way you may have to install a python module or two - all up to you.
(eg:
sudo -H pip3 install flake8)
Notes:
I commented out the plugin for syntastic as I ran into problems with it on large code files.
For those of you who may not know, use :q (eg :help ALE) to get out of a help screen in vim. Some Plug-ins below bring up a quick window that can be exited with q (eg :ALEInfo) or sometimes <Esc> (eg ,m), it depends on the plug-in.
Another quick tip that has nothing to do with plug-ins but may save you some headache using vim on privileged files where you forgot to use sudo. Add this code to you ~/.vimrc and then you can use :SW to sudo write your buffer back to the privileged file.
" Sudo Write
" The '!' after command to allow reload of this command
" and 'silent' to suppress warnings,
" final ':edit!'' gets rid of [O]k, [L]oad prompt
command! SW :execute ':silent :w !sudo tee % > /dev/null' | :edit!
You will be thankful for this keymap the next time you labor over editing an HTML file and you forgot to put sudo on the commandline.
Key Mappings
Once you have fisa-vimrc loaded and the plug-ins installed you now have a slew of key mappings that you may not be aware of.
To see a list of them type this:
:map
This list is long and it can’t be directly printed out. To print out all your shortcut mappings and their source Plug-in type these
commands:
:redir! > vim_keys.txt
:silent verbose map
:redir END
Python Virtual Environments
Many of these Plug-ins are python and require the appropriate module installed. Possible problems can occur with needed modules not found by ALE-vim when in those environments. I had this occur while I was editing my fabfile.py in a virtual environment (see my posts on using python3 fabric) and the plug-in :Isort complained that it couldn’t find python module isort. This happened with either python3 or python2 declared.
Running :PlugStatus did not show any errors. I only noticed it when I requested Plug-vim to run :Isort directly and I got an error saying isort module was not available. The only fix was to install it in my pipenv environment or edit the file outside of the virtual environment. This is not a huge problem but you should be aware of. The best solution is probably to edit the file outside of the environment if you need all the Plug-ins so that the Plug-in doesn’t get listed as a required package.
Vim Leader Key
The default vim <Leader> key is the backslash []. The <Leader> key in vim is the prefix you will use for most of your mapped commands. It makes it easy to switch it if you have a need.
Keep in mind there is a timeout on registering keystrokes which defaults to 1000
You may want to increase that timeout. Here is what I added to the ~/.vimrc:
:set timeout timeoutlen=1500
If you want, you can change the default leader key with something like this:
:let mapleader = "-"
Be careful with what you use for the Leader key. I tried to use the back quote [`] key and forgot that this is the way to go back to a mark so I had to change it.
My suggestion is to leave it as alone.
Loading and resourcing your ~/.vimrc
You will need an easy way to edit and re-source your ~/.vimrc file while playing so add this code:
" to edit this file
" I use "-E" or a similar argument to edit the file itself; that is why
" I used a capital "E" here. You may want to change this.
nnoremap <Leader>E :vsplit ~/.vimrc<CR>

" source this ~/.vimrc file
nnoremap <Leader>so :so ~/.vimrc<CR>
You are already harnessing “The Force” Luke, use it wisely. Go forth and prosper.
Vim-Emmet
This Plug-in (Emmet) and SnipMate work in a similar manner. Emmet is primarily for html while SnipMate (see SnipMate notes in this post) with snippets that are templates for all different file types.See: emmet-vim TUTORIAL
:help Emmet
Within the help is a section labelled Tutorial which is useful for appreciating the power of Emmet.
Open a blank html file - make sure to:
:set ft=html
Then type
html:5<c-y>,
That is: html:5 then <Ctrl>y and a comma.
SnipMate & Snippet Templates
This is a great tool. SnipMate acts as a template manager using “snippet” files to write out preformated text. Each snippet file is associated with a file type and has snippet tags that can be used to trigger writing out a template (from simple to complex).
:help SnipMate <– to see an overview.
or
:h ShipM<tab>
As an example:
:vsplit my.html
then type:
div<tab>
Now type:
table<tab>
or
object<tab>
or
a<tab>
Take a look at these “snippet” files:
ls .vim/plugged/vim-snippets/snippets/
Open them up and get a feel for what has been constructed here. Appreciate how many snippet tags are now available to you.
Here’s a video on this: Video: SnipMate
These snippet become immensely more useful once you start to add your own tags.
For example, I added a markdown “front matter” snippet to ~/.vim/plugged/vim-snippers/markdown.snippet
You will want to keep tabs before all your template lines:
snippet front
	+++
	date = `strftime("%Y-%m-%dT%H:%M:%S-04:00")`
	draft = true
	title = "${1:Title}"
	slug = ""
	tags = []
	image = "/img/${2:img}"
	comments = false    # set false to hide Disqus
	share = false       # set false to hide share buttons
	# menu= ""          # set "main" to add this content to the main menu
	author = "wocos"
	+++
As another example… I have admired the fact that Ben Franklin had 13 virtues which he tried to work on daily. I write journal notes often. Taking that all into consideration, I added a snippet to build a checklist of tasks I would like to accomplish daily. But I only have use for this checklist in text files, which, for me, I typically end with the extension of .nts. To have vim treat these files as ’text’ files I added this to my ~/.vimrc:
" Set text filetypes
autocmd BufRead,BufNewFile *.nts set filetype=text
I then added a new snippet file: ~/.vim/plugged/vim-snippets/snippets/text.snippets:
# For text filetypes

snippet jrnl
	____ **Daily** ____
	Study:
	Teach:
	Read:
	Write:
	Help:
	Finance:
	Clean:
	Maintain:
  Community:
	Phys:

	_______________
To begin a daily entry in my jrnl.nts I use a vim macro to place a date timestamp in the file with this:
" insert date-time stamp
nnoremap <Leader>da O<Esc>:r!date +"\%Y\%m\%d-\%H\%M"<CR><Up>dd<Esc>o
Now while editing a text filetype I can type \da (to insert a date-time stamp) and then jrnl<tab> and guess what shows up.
See :help new-filetype for additional info on filetypes in vim.
Use: :!<your_markdown_viewer> % <– to preview a markdown file. I use typora as my markdown viewer/editor.
Why don’t I just use typora to begin with? I am more efficient in vim and I don’t have to switch out of vim. I am all about fewer keystrokes.
If you do much markdown editing then take a look at typora; it is very useful with non-obtrusive features and it has an attractive presentation.
You should save your markdown file before running it in a preview editor otherwise you will end up with a mismatc. Vim is smart enough to ask you if you want to reload it if it sees changes made by the preview editor.
Tagbar
The Tagbar Plug-in is for navigating code. It lists out variables, and functions with the location and hitting enter on one of those items will move to that location in your code buffer. This can be convenient but I like to have it close the navigation list after moving me to the selected location so I added this:
let g:tagbar_autoclose = 1
Window Chooser - chooserwin
Use :help choosewin to see an overview.
Up front, I use vertical split screens all day long so this plug-in fits my needs perfectly.
Open a few files in vertically split windows or screens with:
vim -O file1 file2 file3
Now hit dash once and choose a window to work in:
-B <– for example, to place the cursor in the “B” window and make it active focus.
I added a line to allow a quick switch of window screens with -- . That is two dashes: dash-dash.
" allow quick switch of window splits
nnoremap -- <C-W><C-W>
If you want to remove a buffer from your buffer list do this:
:bdelete <– close window and remove buffer - it will ask you to save it first if there are any changes. You can use :wa to write all buffers.
Use :vertical sba to open all the buffers up again.
or use a shortcut for this
nnoremap <Leader>sba :vertical sba<CR>
I use this dozens of times every day.
A split screen can be resized. I am only going to share a little info here on vertically split screens (as that is what I mainly use).
This code block might look like it has errors but it is correct.
" to expand the current window 10 places to the right
nnoremap <Leader>> <Esc><C-W>10>
" to shrink the current window 10 places to the left
nnoremap <Leader>< <Esc><C-W>10<
" to make all the windows equal in size
nnoremap <Leader>= <Esc><C-W>10=
" this will make the current focus window full if all the others have saved changes
" you can use :wa to write all buffers
nnoremap <Leader>ful <Esc>:only<CR>
Using the :only shortcut shown above (ie <Leader>ful) will make your current window the only window open and lets you focus on that buffer alone for now. Remember, you can re-open all the buffers in vertical splits with the shortcut we wrote above: <Leader>sba.
Vim-TabMan
:help tabman to get a quick overview.
This plug-in manages tabs while Window Choser (choosewin - see Window Chooser section) manages windows.
You can open multiple buffers from the command line just by entering them on the command line eg:
vim f.1 f.2 f.3 or if you want them split virically use vim -O file.1 file.2 file.3.
Unless you split the windows horizontally, vertically, or in tabs, only one buffer will be shown to you. Buffers are always in memory however.
You can see all the loaded buffers with :ls.
I did not find a configured way to put all buffers in tabs but you can map this action with this:
" to open all buffers in tabs - tab split all
nnoremap <Leader>tsa :bufdo tab split<CR>
Let me get this out of the way, I am not a big fan of tabs. My preference is to use vertical splits. To open all buffers in horizontal splits use: :sba.I have mapped vertical splits for all buffers with this:
" open all buffers in vert splits
nnoremap <Leader>sba <Esc>:vertical sba<CR>
I use this shortcut above often.
This plug-in manages tabs in vim (as opposed to windows).
tt in normal mode opens a new tab after you enter an optional file name followed by tn tab next
There are windows, there are buffers, and there are tabs.
Windows are split screens, either horizontally (:split) or vertically (vsplit)
Buffers are stored in memory and they may appear in a window screen or tab or not.
You can list all the buffers with :ls
You can list the buffers and then select one for display in your current window with this shortcut:
nnoremap <Leader>lsb <Esc>:ls<CR>:b
TabMan set these shortcuts up for you:
tt <– open a new tab
tn <– moves you to the next tab
Numbering and Relative Numbering
I turn off numbering by default so I changed this:
:set nu
Then I set a toggle
set a toggle for numbering
nnoremap <Leader>nu :set nonu!<CR>
Read the comments about relative numbering in the original fisa-vimrc
- it mentions toggling them; here is how
nnoremap
rnu :set rnu! Relative numbering can be useful when you want to yank the next x lines eg: 11Y Then go (P|p)aste it somewhere including another buffer
ALE
ALE (Asyncronous Lint Engine) is a plug-in that offers live syntax checking and the added ability to fix problems with code while you edit. ALE is a game changer. How you code and even your writing can improve with this plug-in.
I love the ALE plugin so I added this inside to the Plug start/end linescall plug#begin('~/.vim/plugged')
…
" ALE
Plug 'https://github.com/w0rp/ale.git'
…
call plug#end()
Lets play with ALE
- load any python script and puposefully have pep8 errors
- type :ALEInfo <– this will show info about what linter are available and enabled and the same for fixers.
- now lets create this file and directory if needed ~/.vim/ftplugin/python.vim <– specific to python filetype Contents:
""" python.vim """
let b:ale_linters = ['flake8','pycodestyle']
let b:ale_fixers = [
\   'remove_trailing_lines',
\   'isort',
\   'ale#fixers#generic_python#BreakUpLongLines',
\   'yapf',
\   'black',
\]
" Be careful with this - it can get wonky and you may have to :q! to avoid writing out errors
" seems like sytastic plug might interfere with all this... not sure about
" this.
" nnoremap <buffer> <silent> <LocalLeader>= :ALEFix<CR>
nnoremap <buffer> <LocalLeader>= :ALEFix<CR>
" ^-- line above is powerful magic... use `\=` to run it
You may have to add these programs/apps to your system
I am a python 3 user and my preference for loading python3 modules is the following (and it is not the ideal way but it works for me)
sudo -H pip3 install black <– installs python3 black module - the sudo -H avoids it scrambling your home directory permission and makes the module available globally (to all users) see here for info on python package management
With ALE loaded and editing a python file if you have pep8 errors then a “gutter” column will be seen on the left edge of your window. If you find and red “»” flags then you know you have significant pep8 errors on those lines. If you move the cursor to those lines the status line at the bottom will tell you what the error might be.
The python.vim file above has a shortcut in it to launch ALEFix… If you hit :u
Also note that the Airline status line shows your the number of errors and warnings at the bottom right (if you have any)
Airline
As for Airline I changed my default theme to papercolor
In your .vimrc…
“let g:airline_theme = ‘bubblegum’
let g:airline_theme = ‘papercolor’
Also add this app: sudo apt install powerline
You may need sudo apt install fonts-powerline as well
And then add it to you Airline section
let g:airline_powerline_fonts = 1
Vim-Surround
:help surround
:help surround-mappings
" use: ysiW = means surround with backtick nmap <Leader>sw" ysiW" nmap <Leader>sw' ysiW' nmap <Leader>sw ysiW’
" sl( means surround (rest of) line with ()
nmap
print these words
<Esc>ys3w)
results in:
print (this and that)
vs
print this and that
<Esc>ys3w(
results in:
print ( this and that )
Vim-surround doesn’t do multiple character which can be annooying. In cases where you need to surround text with multiple characters you will probably need to write your own mappings. Here is a example of how to surround a paragraph of markdown code with three backticks ie (```).
" markdown for a block of code for a paragraph
" vim-surround is great but it doesn't do this...
nnoremap <Leader>mdc {O<DOWN>```<DOWN><ESC>}i```<ESC><DOWN>O<ESC>
Vim-Matchit
Use this to get initial help :help matchit.
This plugin allows quick navigation to common code block tags. It is an enhancement of vim’s capability to go from matched perens tags (for example) using the % key.
To see what matching pairs are currently set type: :set mps
See this post for additional tips using matchit: Post: Vim Plugins Matchit
Given this buffer you can have the cursor on the tag <body>, if you hit % it will to corresponding close tag </body>. Be aware that if your cursor is on the “<” or the “>” then the obvious will happen - the opposing bracket will be the target.
Vim_AutoClose
Again, to get help: :help AutoClose
Type the begining of a “pair” and AutoClose will add the closing mark. AutoClose will do replacements for you as well.
Assuming the cursor is on
"_"in the example below…
If you use x to delete the _ and then hit v for visual mode… then type $ to go to the end of the line… now you can use <Leader>a( and …
print_"this or that"
results in:
print("this or that")
Use :let g:AutoClosePairs<tab> to see what is currently paired.
One problem I ran up against was in markdown files hitting three backticks (```) would end up doubling them. To fix that I had to reset the pairings so the backtick would not be part of the AutoClose feature. I noticed that this next line works …
Note: As the help files suggest you need to use the autocmd here to have this load after the vimrc commands.
autocmd filetype markdown let g:AutoClosePairs = {'"': '"', '{': '}', '''': '''', '(': ')'}
but this fails:
autocmd filetype markdown let g:AutoClosePairs_del = "`"
I had to set that AutoClosePairs setting to avoid inappropriate additions to triple backticks for code blocks and when adding a link using snippet (see SnipMate) with “[
YankRing
Use this to learn about YankRing: :help yankring-tutorial
:YRShow <– to select one of the recent deletes or “yanks”.
It defaults to 100 lines and is good for reviewing what specific changes have been made.
Here is an article on using YankRing: Command Line YankRing- Linux Magazine
This comes in handy for me when I yank some text to put in other places in a buffer. I make my first placement of the yanked code but then I see something else that needs editing. Now I have lost the ability to just put the text I yanked earlier. This is where YankRing can come to the rescue. Use :TRShow, highlight the previously yanked text and hit enter. The text will get placed where your cursor is.
I have no idea why fisa-vimrc did not include a map for :YRShow, but I added it to my ~/.vimrc with this code:
" YankRing
nnoremap <Leader>yr :YRShow<CR>
You can hit ? while the focus is on the YankRing window to display the options available.
YankRing makes yanking text a little easier too.
Given this next line:
Here I want to yank this: (everything in this parens clause) and nothing else.
I want to yank just what is in the parens. Move the cursor to the ( and then hit yf) which means yank forward up to and including ). Now I move to where I want and hit P or p and drop in the yanked parens clause.
If you are accustomed to using registers in vim then I applaud you. But if you are like me, you just haven’t taken the time to develop the muscle memory for using them. YankRing kind of does registers for you.
Please, read the yankring-tutorial to learn more.
Vim-NeoComplCache
To see an introduction on this plug-in: :help neocomplcache.
Initially, I had a love-hate feeling about this plug-in. It pops up a selection window of possible completion words from a cache. The was fisa-vimrc configures the plugin, hitting Enter at the end of a line often ended up selecting a word that I had not wanted but fortunately there is a way to suppress that. Make this one change and life with neocompcache will be a little less intrusive.
"let g:neocomplcache_enable_auto_select = 1
let g:neocomplcache_enable_auto_select = 0
I also set up a toggle to turn this on or off as I desired with this entry into my ~/.vimrc:
" NeoComplCache
nnoremap <Leader>neo :NeoComplCacheToggle<CR>
Now using <Leader>neo, neocomplcache gets toggled.
NERDTree
nerdtree https://github.com/scrooloose/nerdtree
:help NERTree
<F3> opens NERDTree and provides a navigable directory tree file selector
This visually is great but, in my humble opionion, when you have CtrlP NERDTree becomes a secondary value. It is valuable when you have a large complicated file tree to navigate.
NERDCommenter
:help NERDCommenter
Another similar tool is tcomment-vim - people get religiously stoked about which one is better.
This can be used to comment a line
<Leader>c<Space>
To add a comment at the end of a line
<Leader>cA
CtrlP
Start your exploration with
,m
This will bring up any recent files you have edited and allow you to hit enter on it and bring up the file in edit mode as another buffer. I find this very useful. If you type while in the list letters that might be in the filename you want, CtrlP will start to filter the list to match your typing - it does a fuzzy search on the past file load list. I use this all the time.
The fisa-vimrc has changed the default activate trigger to ,e with this line:
let g:ctrlp_map = ',e'
I don’t know why this was changed from <Ctrl>p but for now I am going with it.
Keep in mind that CtrlP is a fuzzy file search engine so you only have to come close, and I mean, a little bit close. Just start typing letters (after invoking ,e) that you think are in the file/dir name… it will find it. Hitting Enter will open the file in the current window. While in the list <Ctrl>v will open the file in a vertical split… <Ctrl>x will opena horizontal split (hey, don’t blame me, must be some reason why it isn’t <Ctrl>h which does something else which I can not entirely explain Oh and <Ctrl>t opens the file in a tab).
There is a lot more this can do but my experience level is so low I am unqualified to …well you understand.
:help CtrlP <– to get help - BTW you can shortcut :help with :h
See: Supercharging Vim Navigation
Keep in mind the ,t will open NERDtree for you to select a file from the file tree (See NERDTree).
TaskList
If you are using fisa-vimrc the :TaskList<CR> This brings up a new window with a list of each line containing one of the defines “Tokens” (eg “TODO”, “DEBUG”, etc). Hit
I added this next line to my ~/.vimrc to add “WIP” and “DEBUG” … by the way, these Tokens appear to be case sensitive.
let g:tlTokenList = ['TODO','ToDo', 'WIP','DEBUG','FIXME','xxx', 'XXX' ]
Warning! You can save this task list by hitting :w while viewing it BUT it will create a file called -TaskList_1- <– that preceding dash will get treated by the shell as an argument token so you will have a problem deleteing or moving (etc) the file. To delete it you will have to do something like this:
ls -- -TaskList_1-  # to confirm
rm -- -TaskList_1-
Vim-Ack
This Plug-in is an incredibly fast recursive grep. It will search all the files in your file tree starting at the current directory by default finding any occurrance of the string you provide.
The Ack plug-in uses the commandline tool called ack. You may have to install it on your system.
sudo apt install ack
To use it:
:Ack 'what ever string you want to look for'
After entering that a list of every file with this string will immediately appear. Did I mention that it is fast?
Here is a fact you can bring to your next party… ack is a perl (perl5 I believe) app. Here is how you can prove it from the command line:
file $(which ack)
And yet…. it is fast!
More information on how to use ack ack command line use
Dir-Configs-Override
This Plug-in allows you to write a custom .vimrc and place it in a folder which will then will override the ~/.vimrc settings.
This plug-in (dir-configs-override) does not give me much personally but it can have usefulness in special circumstances.
Here is more info: dir-configs-override
Git-Vim
:help Git <– go throught this and you will hit the keymap shortcuts, here are some of them:
<Leader>gs <– git status
<Leader>gl <– git log
<Leader>gd <– git diff
<Leader>gD <– git diff –cached
<Leader>ga <– git add
<Leader>gc <– git commit
<Leader>gp <– git push
These are simple but they do save time.
Vim-Colorizer
See https://github.com/lilydjwg/colorizer
This will highlight and #rgb string in your buffer (typically HTML) with the actual color you are coding.
If you write much HTML then you will appreciate this plug-in.
Other Personal Changes and Short-Cuts
Managing Tabs
I changed the default tabs BUT also declared tabs to be =4 in python filetypes.
In ~/.vimrc I chaged these lines:
" tabs and spaces handling
set expandtab
set tabstop=2
set softtabstop=2
set shiftwidth=2
" to see tab, end of lines etc use :set list
" to convert existing tabs to spaces use :retab"
And in ~/.vim/ftplugin/python.vim:
" tabs and spaces handling
set expandtab
set tabstop=4
set softtabstop=4
set shiftwidth=4
Bonus Plugs - enhancing productivity
Vim-Calendar
If you work in a vim terminal a lot then consider adding this plugin… just make sure you put this line between call plug#begin('~/.vim/plugged') and call plug#end().
" Calendar
Plug 'https://github.com/itchyny/calendar.vim'
Then later in your ~/.vimrc add this if you want to integrate with your google calendar. You will need curl or wget on your system and you will need to get out of vim and then return and type :Calendar. You will be taken to a google account auth page and given a “key” code to insert back into vim. It is very easy and the result is pretty powerful.
" Calendar settings
let g:calendar_google_calendar = 1
let g:calendar_google_task = 1
Use :help calendar to learn more.
If nothing else, this plug-in just looks cool.
Vim-TaskWarrior
I need to write another post on this amazing tool!
I use taskwarrior to try and track tasks. If you have trouble focussing on a task then consider grabbing a pomodoro tool to help you stay focused. I use a great little script called patata patata. I modified this script just a bit to play a sound instead of just the terminal bell.
Using the :TW plug-in takes a little getting used to and docs are not my style so I had to find clues from other blogs.
Once installed, just type :TW and it brings up your taskwarrior list a screen that looks a whole lot like vit. You should probably install vit separately just so you can learn it’s command as :TW uses the same commands. You can use vit independently or even call it up while in vim with :!vit but :TW does seem to add a few things. I haven’t become completely immersed in this plug-in yet but I am definitely a fan of taskwarrior (ie task) and vit.
Go here for :TW commands
I also have inthe.am configured and loaded which synchronizes all my tasks to the web. That allows me to manage them from any device!
Vim-Markdown-Toc
I use this plug-in to build (or update) a table of contents for large markdown post. It was used on this post.
https://github.com/mzlogin/vim-markdown-toc
To use this go to the location where you want the TOC then type: :GenTocGFM. It will use all the headings going forward in the document to build a simple TOC.
Honorable Mentions
If you play with databases then you might consider loading up vim-dbext. I use it with an SQLITE3 database that I keep around that has tables for my contacts, recipes, notes, devices, etc.
Load this plug-in with this line (in the appropriate section) in your /.vimrc:
Plug 'vim-scripts/dbext.vim'
Then add your sqlite db info into your ~/.vimrc eith something like this:
let g:dbext_default_profile_myphile='type=SQLITE:dbname=/data/share/db_dir/myphile.db'
Use <Leader>sbp to select your connection profile.
Type a line like this:
select * from recipes limit 3; and while on this line hit <Leader>sel.
I haven’t tried these yet but they look worthy of exploring
- vim-eunich
- vim-multiple-cursors
see: [10 Essential Vim Pluggins](https://medium.com/@huntie/10-essential-vim-plugins-for 2018-39957190b7a9)
You might also be interested in vim-vmail located here ]
To install width vim-plug
This link provides a good basic overview of using vi… great for anyone new to vi, also good to review even by a crusty old salt. vi12.shtml
I hope you have gained an appreciation for the power vim offers. Managing the available plugins to make your workflow more efficient and productive is the goal. Let me know if any of this served to that end (or not).
Enjoy,
Send mail to: geoff.mcnamara@gmail.com
This post is ever evolving and may change, hopefully for the better.
Please share your suggestions, reactions, or thoughts.

